DIY Paper Plate Masks: Unleash Your Creativity

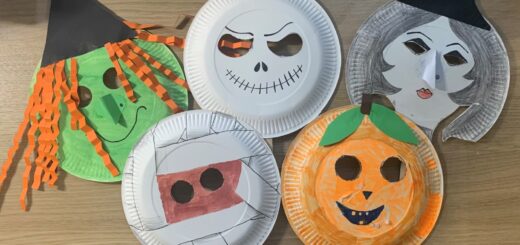
Paper plate masks are a fantastic way to engage in a fun and imaginative crafting activity that’s perfect for kids and adults alike. With just a few simple materials, you can transform ordinary paper plates into whimsical masks that will ignite your creativity. In this step-by-step guide, we’ll walk you through the process of making your very own paper plate masks.
Materials You’ll Need:
- Paper plates (white or colored)
- Scissors
- Markers, crayons, or colored pencils
- Craft glue or a glue stick
- Hole punch
- Elastic cord or ribbon
- Decorative items like feathers, sequins, yarn, and fabric scraps
Step 1: Choose Your Design
Start by deciding what type of mask you want to create. Will it be an animal, a superhero, a fantasy creature, or something entirely unique? Once you’ve settled on a design, gather reference images to help guide your creative process.
Step 2: Preparing the Paper Plate
Place the paper plate on a flat surface with the front side facing up. This will be the surface you decorate. If you’re using a colored plate, it can serve as the base for your mask. Otherwise, you can paint the plate with acrylic paints or colored markers to match your design. Let it dry completely before moving on.
Step 3: Design and Decorate
Now comes the exciting part – bringing your mask to life! Use markers, crayons, or colored pencils to draw your chosen design onto the paper plate. Add features like eyes, a nose, and a mouth. Experiment with colors and patterns to make your mask truly unique. If you’re making an animal mask, think about the texture of the animal’s fur, feathers, or scales.
Step 4: Cut Out the Mask Shape
Carefully cut out the shape of the mask using a pair of scissors. Remember to cut out holes for the eyes, and possibly for the nose and mouth depending on your design. Take your time with this step to ensure smooth edges and even shapes.
Step 5: Adding Elastic Cord or Ribbon
To wear your mask comfortably, you’ll need to attach some form of a strap. Measure a piece of elastic cord or ribbon that’s long enough to fit around your head comfortably. Punch a hole near each side of the mask and thread the cord or ribbon through the holes. Tie knots on each end to secure the strap.
Step 6: Embellish and Personalize
This is where you can really let your creativity shine. Use craft glue or a glue stick to attach decorative items like feathers, sequins, yarn for hair, or fabric scraps for additional textures. Be sure to follow your design plan while adding these embellishments.
Step 7: Allow Everything to Dry
After adding all the decorative elements, set your mask aside to dry completely. This will ensure that the glue adheres properly and that your mask is sturdy and ready to wear.
Step 8: Try on Your Creation
Once your mask is dry, gently tie the elastic cord or ribbon around your head and try on your creation! Adjust the strap as needed for a comfortable fit. Stand in front of a mirror to admire your work and revel in the excitement of bringing your imagination to life.
Creating paper plate masks is an engaging and creative activity that allows you to explore your artistic talents and develop your design skills. Whether you’re making masks for a themed party, a school project, or simply for imaginative play, this DIY project guarantees hours of fun and a sense of accomplishment.
So, gather your supplies, let your imagination run wild, and start crafting your own collection of paper plate masks. Get ready to step into a world of make-believe and enjoy the magic of turning simple paper plates into captivating works of art!
Here you can find some creative Ideas:
• Christmas Paper Plate Masks
• Animal Paper Plate Masks
• Superheroes and Villains Paper Plate Masks
• Fairy Tale and Storybook Characters
• Mythical Creatures
• Outer Space and Aliens


